Some ideas for using pattern tiles

Some general principles first:
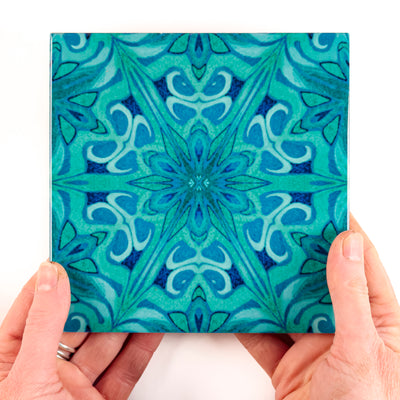
1) a richly patterned tile almost always works best in a plain setting. Unless you're going for the "full maximalist" look, try not to have different patterns in close proximity. They are quite likely to compete, ending up looking too busy and 'thrown together'.
This also applies to textures - so my suggestion would be to think carefully before putting a textured tile (even one in a plain colour) alongisde a patterned tile. It IS possible to make it work, but it can also end up a bit of a jumble.
2) if in doubt, go for a larger tile size. Not only do they work out slightly cheaper per square metre (or yard) than the smallest tiles, a larger tile minimises the 'grid' effect of the grout lines. Meaning you get more colour and pattern, and less interuption.
However bear in mind that tile size is often mostly dictated by what will fit best in the space. There's no point in choosing a 20cm / 8in tile if 30% of each tile will end up as offcut!

3) think about grout spacing and grout colour before you start installing your tiles - in other words, don't just let your tiler use whatever they have to hand!
Standard brilliant white grout will create a stark contrast with most pattern tiles, and using large spacers will make this effect even more obvious.
Of course, this may be the effect you're after, but if you'd rather the grout hid in the background, choose a colour that ties in with the tiles.
A soft cream, pale green, muted blue or grey would work with most pattern tiles. The closer the grout colour is to the main colour of your tiles, the less the 'grid' effect will be noticeable.
Below are some ways to use pattern tiles without breaking the bank...
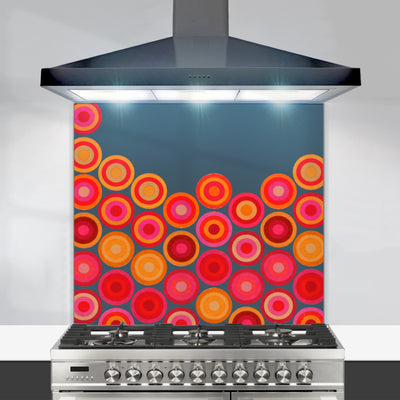
1: Pattern Tile Splashback

Tiles are a classic treatment for a splashback. They're a lovely way to add some colour and pattern to a neutral space, as well as providing a hard-wearing, easy to clean surface.
Tiles bounce light and reflections around beautifully - a tile panel will add interest and depth to a space in a way wallpaper and paint won't.
Measurements are critical and may dictate which tile size works best - you don't want lots of your expensive tiles to end up as offcut!
If you expect to have to cut tiles to accomodate pipework etc. it may be worth buying some spare tiles in case of breakages. Cutting is simple but doesn't always go according to plan!
2: Feature Wall of Pattern Tiles

A bold and often very effective design statement.
Avoids any issues of tile size and depth (no need to worry about getting grout lines to match, or having a 'step' between different types of tile on the same wall.
If it's a larger area, consider a larger design (or a larger tile size). Small patterns can look 'busy' and a big pattern often works better.
3: Border or Row of Accent Tiles

A row is a great way to combine a smaller number of bespoke tiles with a cheaper commercial tile, or a different wall treatment (eg paint, paper).
Some tiles particularly lend themselves to rows (eg Ocean Shoal 'border' tile which is designed for this)
Tile sizes (width and height) and tile depths can be a headache. You may find that the pattern tiles are different widths or depths to the tiles available from mainstream manufacturers. This means that it may be difficult or impossible to get the grout gaps to line up accurately, or there may be a step between one type of tile and another.
One way to deal with this is to install a border tile, pencil tile, or tile strip between the pattern area and the rest of the tiling. This hides any difference in depth and smooths the transition, making grout lines that don't line up less of a problem.
There's more information on tile strip and border tiles here.

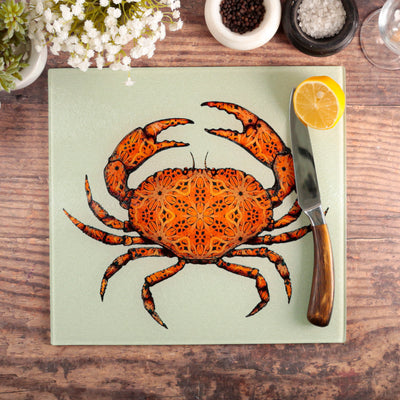
Inset Panels

A relatively small number of beautiful tiles are made into a focal point by creating a decorative panel.
In a run of plain and patterned tiles, sizes can be problematic. Beware small differences in tile width and depth that will mean your grout lines don't line up.
Marking a definite 'edge' to the patterned tiles may help. A border tile, pencil tile, or tile edging strip can make them more of a feature and avoid steps in your grout lines.
'Dotted About'
 This can be a great way to add some colour and interest to an expanse of cheaper plain tiles
However, tile sizes vary a lot .. one manufacturer's '15cm' tile may be 14.8, 15.0 or 15.2cm
... which means you're going to have to be very careful to get plain tiles that will line up with your pattern tiles.
Depths of tiles also vary hugely - a tiny difference can be taken up with tile adhesive, but too much of a difference will give you a 'step' between one type of tile and the other.
Take your pattern tiles along when you buy your plain tiles. Measure carefully - a few millimetres difference out will give you a big headache.
Letters and Numbers

Letter and number tiles are a lovely way to add some character and personal detail to both interior and exterior locations.
These can also be framed beautifully as house numbers, or used inset in floors.
For anywhere that'll get a lot of UV (eg conservatories, pools, or exterior applications, go for the Fired Ink version.